Thursday, December 29, 2011

Chicken Tikka Masala

I made Chicken Tikka Masala for the first time, last year with a recipe I found in a magazine. The hubby started mentioning the dish recently so I decided to surprise him last night for dinner by making it. The big bummer was that I couldn't find that recipe. I swear my recipe binder is getting too big! So I did an internet search for Chicken Tikka Masala and found this one. It worked out great because I didn't have any garam masala--an ingredient that is often used in this type of recipe--but this recipe didn't call for it. I thought I still had some from the last time I made this dish but I didn't and couldn't find it after searching 2 grocery stores. This recipe was definitely delicious but I think that the garam masala is needed for that authentic flavor.

I made just a couple of modifications, I had 8 chicken thighs I wanted to use up so I substituted the chicken breast with them. Also, I didn't add the jalapeno as I knew it would already have a kick with all the spices. This was a great recipe and the naan I made along with it was a nice way to soak up the spicy sauce. Enjoy!


Chicken Tikka Masala
Recipe posted by Yakuta on AllRecipes.com
Serves 4

Ingredients for marinade:
1 cup yogurt
1 tablespoon lemon juice
2 teaspoons ground cumin
1 teaspoon ground cinnamon
2 teaspoons cayenne pepper
2 teaspoons freshly ground black pepper
1 tablespoon minced fresh ginger
4 teaspoons salt, or to taste
3 boneless skinless chicken breasts, cut into bite-size pieces (I used 8 chicken thighs instead)
4 long skewers (I didn't use these)

Ingredients for sauce:
1 tablespoon butter
1 clove garlic, minced
1 jalapeno pepper, finely chopped (I didn't use this)
2 teaspoons ground cumin
2 teaspoons paprika
3 teaspoons salt, or to taste
1 (8 ounce) can tomato sauce
1 cup heavy cream
1/4 cup chopped fresh cilantro

Directions: In a large bowl, combine yogurt, lemon juice, 2 teaspoons cumin, cinnamon, cayenne, black pepper, ginger, and 4 teaspoons salt. Stir in chicken, cover, and refrigerate for 1 hour (I marinated for 3 hours).

Preheat a grill for high heat  (I cooked my thighs in a nonstick skillet with 1 tablespoon of butter. It was way too cold to grill these outside). Lightly oil the grill grate. Thread chicken onto skewers, and discard marinade. Grill until juices run clear, about 5 minutes on each side.

Melt butter in a large heavy skillet over medium heat. Saute garlic and jalapeno for 1 minute. Season with 2 teaspoons cumin, paprika, and 3 teaspoons salt. Stir in tomato sauce and cream. Simmer on low heat until sauce thickens, about 20 minutes. Add grilled chicken, and simmer for 10 minutes. Transfer to a serving platter, and garnish with fresh cilantro.


Tuesday, December 27, 2011

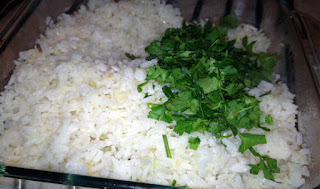
Orange Beef with Cilantro Rice

This recipe looked great so I decided to give it a shot and it came out delicious. Although the recipe called for cooking this dish in a wok, I used a regular non-stick skillet and it worked great. It was super easy and very flavorful. Also, I used flank steak instead of skirt steak and it was wonderful. This is definitely a keeper. Enjoy!


Orange Beef with Cilantro Rice
Recipe by Rachel Ray magazine
Serves 4

Ingredients:
Grated peel of 1 orange and juice of 2 oranges
1/2 tablespoons extra-virgin olive oil
1 tablespoon soy sauce
1 tablespoon rice vinegar or white wine vinegar
1 pound skirt steak, thinly sliced on the diagonal and slices halved crosswise
1/2 cups long-grain white rice
1 bunch scallions, white parts thinly sliced and green parts cut into 1-inch-long pieces
1 tablespoon brown sugar
2/3 cup finely chopped cilantro
Salt (I used 1 teaspoon along with 1/2 teaspoon of fresh pepper)


Directions: Place the orange peel and juice in a large bowl. Stir in 1 tablespoon olive oil and the soy sauce and vinegar. Add the steak and turn to coat. Cover and refrigerate for 30 minutes.

Meanwhile, in a heavy saucepan, bring the rice and 1 3/4 cups water to a boil. Cover; simmer for 20 minutes. Fluff with a fork and keep warm.

In a wok or large skillet, heat 1 tablespoon olive oil over high heat. Using tongs, transfer the meat from the marinade to the wok and cook, turning once, for 5 minutes. Transfer the meat to a plate.

Add the remaining 1/2 tablespoon olive oil and the scallions to the wok and cook over medium heat, stirring, until wilted, 2 minutes. Transfer to the beef. Pour the marinade into the wok and bring to a boil, then lower the heat and reduce by half. Whisk in the sugar and return the steak and scallions to the wok; turn to coat.

Stir the cilantro into the rice; season with salt. Mound some rice and beef onto each plate.


Saturday, December 24, 2011

French Bread and Slow-Cooker Pear and Apple Butter

I have a new passion for making bread. I don't know if it's the smell of fresh bread or the feeling of working with dough and patiently watching it turn into something so delicious. I just love it. I bought myself a french bread pan last year from Williams-Sonoma and it is so wonderful for making french bread. There was a recipe on the belly band of the pan that is super easy and always comes out wonderful. I have made at least 30 loaves of this recipe since purchasing this pan. This year for the holiday, I decided to also make mini loaves. The recipe below makes 2 large loaves but I wanted to give these out as gifts with this slow-cooker pear apple butter recipe I found--recipe below. So I made the recipe for the french bread as usual but instead of shaping two large loaves, made 4 mini loaves. These are so wonderful and I hope my friends enjoy it as much as did making them!


French Bread
Makes 2 large loaves
Recipe by Williams-Sonoma

Ingredients:
2 cups water (warm 110 F or 43 C)
1 teaspoon sugar
3 1/4 teaspoons active dry yeast
5 -5 1/2 cups flour (plus additional flour for dusting) (I only use 5 cups)
2 1/2 teaspoons salt
1 egg white, lightly beaten with a pinch of salt

Directions: In a small bowl, combine the warm water and sugar, stirring until the sugar dissolves. Add the yeast and stir gently to mix. Let stand until foamy, about 5 minutes.

In the bowl of an electric mixer fitted with the dough hook, combine 4 cups of the flour and the salt. Beat on low speed just until combined. Slowly add the yeast mixture and beat just until incorporated about 1 minute. Increase the speed to medium low to medium and beat for 10 minutes adding more flour, about 1/4 cup at a time, (I only needed to use 1 cup) until the dough is elastic and pulls away from the sides of the bowl.

Turn the dough out onto a lightly floured surface and knead for 1 minute. Form into a ball and dust lightly with flour. Sprinkle a little flour into a bowl and transfer the dough to the bowl. Cover with plastic wrap and let rise in a warm place until doubled in bulk. 45-60 minutes.

Turn the dough out onto a lightly floured surface. Punch down the dough and knead for a few seconds. Form the dough into a ball and return to the bowl again. Cover the bowl with plastic wrap and let rise in a warm place until doubled in bulk. 20- 30 minutes.

Turn the dough onto a lightly floured surface and punch down. Cut the dough into 2 equal pieces and shape each into a ball. Let rest 5 minutes.

Line a french bread pan with a clean kitchen towel and sprinkle with a little flour. Roll each ball into a log with tapered ends, about the length of the pan, and place on the towel in the pan. Cover with the overhanging edges of the towel and let rise in a warm place for 20 minutes.

Position an oven rack in the lowest position of the oven, and place a baking pan 1/3 full of boiling water on the rack. Preheat oven to 425 F (220C). Gently lift the towel holding the loaves off of the pan, taking care not to let the loaves touch each other and set on a work surface. Spray the pan with non-stick cooking spray and using the towel as a guide gently flip each loaf into a well in the pan. Brush off excess flour. Using a sharp knife, make 3-5 diagonal slashes in the loaves about 1/4 inch deep (6mm). Brush with the beaten egg white mixture. Bake on center rack until the bread sounds hollow when tapped, about 30-35 minutes. Transfer the pan to a wire rack and cool the loaves in the pan until room temperature.


These are the 4 mini loaves.

Slow-Cooker Pear and Apple Butter
Makes 6 cups
Recipe by Everyday Food


Ingredients:
2 1/2 pounds Bartlett or Anjou pears (about 5)
1/2 pounds McIntosh or Gala apples (about 5)
1 cup packed dark-brown sugar
1/2 teaspoon coarse salt
1 cinnamon stick

Directions: Peel, quarter, and core pears and apples. In a food processor, finely grate fruit (in batches if necessary), then transfer to a 5- to 6-quart slow cooker. Stir in dark-brown sugar, salt, and cinnamon stick. Cover and cook on high, 4 hours.

Remove cinnamon stick and reserve. Transfer mixture to processor (in batches if necessary) and process until smooth. Return to slow cooker, along with cinnamon stick, and cook on high, uncovered, until mixture is thick and browned, 4 hours. Discard cinnamon stick and let mixture cool. Transfer to airtight containers and refrigerate, up to 3 weeks, or freeze, up to 3 months.

Wednesday, December 21, 2011

Butternut Squash Soup

I love making soups in the Winter. So when I came across this butternut squash soup recipe, I had to give it a shot. It worked out great because I had all the ingredients at home already and just needed to buy the butternut squash. This soup came out nice and thick without having to use any heavy cream. This is was a super easy and delicious recipe. Enjoy!


Butternut Squash Soup
Serves 4-6

Ingredients:
2 tablespoons butter, at room temperature
2 tablespoons extra-virgin olive oil
1 medium onion, chopped
1 medium carrot, peeled and chopped into 1/2-inch pieces
3 cloves garlic, minced
3 1/2 pounds butternut squash, peeled, seeded, and cut into 3/4-inch pieces (about 7 to 8 cups)
6 cups low-sodium chicken stock
1/4 cup chopped fresh sage leaves
Kosher salt and freshly ground black pepper

Directions:
In an 8-quart stockpot, add the butter and oil and melt together over medium-high heat. Add the onion and carrot and cook, stirring occasionally, until the onion is soft, about 5 minutes. Stir in the garlic and cook until aromatic, about 30 seconds. Add the squash and the chicken stock. Bring the mixture to a boil and add the sage. Continue to boil until the vegetables are tender, about 20 minutes. Turn off the heat. Using an immersion blender, (I put this in my blender once it cooled) blend the mixture until smooth and thick. Season with salt and pepper, to taste. Keep the soup warm over low heat.


Friday, December 16, 2011

White Bean and Hominy Chili

I love chili so when I saw this unique recipe, I had to try it. I never heard of a chili with hominy in it. My family is from Ecuador and hominy is commonly known as mote there. We boil it and serve it as a side dish with a tomato and onion salad. We also buy the dried version which comes in clear bags. We then fry it and it crunches up and we eat it with ceviche. It is called tostado when we fry it. So this recipe called for the canned version which you can find in the international isle of most supermarkets. This chili tasted like a Mexican style chili with the hominy, cilantro and lime. I didn't go out and buy the Mexican chipotle sausage for this recipe. I substituted this with Italian sausage which I took the casing off of and cooked in a cup of water until the sausage was completely cooked. I served the chili with toasted chips on the side and a scoop of sour cream. This is definitely a keeper. Enjoy!


White Bean and Hominy Chili
Recipe from Cooking Light magazine
Serves 6

Ingredients:
2 (15-ounce) cans no-salt-added cannellini beans or other white beans, rinsed, drained, and divided
1 tablespoon olive oil
1 (4-ounce) meatless Mexican chipotle sausage (such as Field Roast), finely chopped (I used Italian Sausage, casing removed)
1 1/2 cups chopped white onion
3 garlic cloves, minced
2 poblano chiles, seeded and chopped (I did not use these)
2 teaspoons chili powder
1 teaspoon ground cumin
1/2 cups water
2 tablespoons chopped fresh oregano
2 teaspoons hot pepper sauce (such as Tabasco)
1/2 teaspoon salt
1 (15.5-ounce) can white hominy, rinsed and drained
2 tablespoons thinly sliced green onions
2 tablespoons chopped fresh cilantro
8 lime wedges
Sour cream (I topped the chili with a scoop)

Directions:
1. Mash 2/3 cup beans with a fork.
2. Heat a large Dutch oven over medium heat. Add oil to pan; swirl to coat. Add sausage, and sauté for 4 minutes. (I used Italian sausage, casing removed. I placed sausage in the dutch oven with a cup of water and let it get browned and cooked through). Add onion, garlic, and poblanos; sauté 6 minutes. Add chili powder and cumin; cook 30 seconds, stirring constantly. Add mashed beans, whole beans, 1 1/2 cups water, and the next 4 ingredients (through hominy). Bring to a boil. Cover, reduce heat, and simmer for 20 minutes or until slightly thickened. Stir in green onions and cilantro. Serve with lime wedges and a scoop of sour cream.


Monday, December 12, 2011

Chicken Tinga Tacos

I am so excited...school is over and I cook my heart out now! Or at least for a month until school starts up again. <sigh> So, I sorted out my recipes for the week and the first one up is Chicken Tinga Tacos from Food and Wine magazine. This is a really yummy recipe but I warn you, it is spicy! So if you don't like spicy, don't use the chipotles--or not as many. Ever since watching Top Chef this year, my biggest take away is "taste your food as you cook." Good thing I did this before I blended it all together! So I was able to take out most of the whole chipotles. It still had a kick but was yummy with the sour cream. I used sour cream instead of the Cotija cheese. Honestly, I found the Cotija cheese at the supermarket but it was $8 for a block of it and I just didn't want to spend the money on a cheese I hadn't tried before. The sour cream was a great substitute but if you like Cotija cheese, I would use that when you make this. Enjoy!


Chicken Tinga Tacos
Recipe from Food and Wine magazine
Makes 24 tacos

Ingredients:

1/4 cup plus 2 tablespoons extra-virgin olive oil
2 1/2 pounds trimmed, skinless, bone-in chicken thighs
Salt and freshly ground black pepper
1 large onion, thinly sliced
3 large garlic cloves, minced
One 28-ounce can diced tomatoes
2 canned chipotles in adobo, coarsely chopped (I used only 1 chipotle from the can)
1 cup chicken broth
24 corn tortillas
2 ounces Cotija cheese, crumbled (I used 1 cup of sour cream)
Sliced scallions and chopped cilantro, for garnish

Directions: Heat 3 tablespoons of the olive oil in a large nonstick skillet. Season the chicken all over with salt and pepper, add it to the skillet and cook over moderately high heat, turning once, until browned, about 12 minutes. Transfer the chicken to a 9-by-13-inch baking dish and pour off the fat in the skillet.

Add the remaining 3 tablespoons of olive oil to the skillet along with the onion. Cook over moderately high heat, stirring occasionally, until the onion is lightly browned and softened, 5 minutes. Add the garlic and cook until fragrant, 2 minutes. Add the tomatoes and their juices, the chipotles (I used only 1 chipotle from the can) and the broth and bring to a boil. Simmer over moderate heat, stirring occasionally, until thickened and slightly reduced, 20 minutes.

Preheat the oven to 350°. Transfer the sauce to a food processor and let cool for 15 minutes. Puree until smooth and season with salt and pepper. Pour the sauce over the chicken. Bake the chicken uncovered in the center of the oven for about 45 minutes, until the meat is tender and the sauce is very thick and darkened around the edges. Wrap the tortillas in foil and warm them in the oven for about 10 minutes.
Remove the chicken from the sauce and shred the meat; discard the bones. Return the chicken meat to the sauce. Spoon about 3 tablespoons of chicken onto each tortilla and sprinkle with the crumbled cheese (I used sour cream). Garnish the chicken tacos with the scallions and chopped cilantro and serve hot.

MAKE AHEAD - The tinga can be refrigerated for up to 3 days and reheated gently.


Friday, November 25, 2011

Happy Thanksgiving!

I love Thanksgiving and this year I loved it even more because we were hosting it. This was the perfect opportunity for me to flex my cooking and baking muscles as I needed to feed 17 people. Luckily my hubby helped me around the kitchen which was a great help! (Thanks baby!) Although I was totally prepared to cook everything, my family insisted on helping out so I let them each bring side dishes (veggie, mashed potatos and salad). However, I was in charge of the turkey and desserts. But this year I also wanted to try some new side dishes. So I made mac & cheese and a sweet potato casserole. Let me just say that I really lucked out with some great recipes this year. The turkey recipe, by new favorite chef Anne Burrell, was amazing! Considering how long and all the effort it took to make this 20 pound turkey, I would definitely do it all again next year because it came out so amazing. I made and dunked the turkey in the brine on Tuesday morning and cooked the turkey on Thursday. So it was in the brine for roughly 2 days. Also the mac & cheese by the Neely's was delicious! Really easy to make and was packed with flavor. Then I found a knock off recipe for Boston Market's sweet potato casserole which was yummy!

So overall, Thanksgiving dinner came out wonderful and I couldn't be happier. I was so excited with the dishes that I forgot to take pictures of the end products. LOL! Enjoy!


Brined Herb Crusted Turkey with Apple Cider Gravy
Total prep and cook time: 5 hours 

Ingredients:
Brine:
7 quarts water
1 quart apple cider
3/4 cup kosher salt
1/3 cup granulated sugar
1 large onion, diced
1 large or 2 small carrots, diced
3 ribs celery, diced
1 head garlic, cut in 1/2 equatorially
1/2 bunch fresh rosemary
1/2 bunch fresh sage
6 bay leaves
1 (12 to 14 pound) turkey, free range organic is great! (I used a 20lb. Butterball turkey)

Herb crust:
1 bunch fresh rosemary, leaves finely chopped
1 bunch fresh sage, leaves finely chopped (I used ground sage because I couldn't find the fresh stuff any where)
3 sticks butter, room temperature
Kosher salt
You will also need butcher's twine to truss the turkey

Gravy:
1 large onion, cut into 1/2-inch dice
1 large or 2 small carrots, peeled and cut into 1/2-inch dice
2 ribs celery, cut into 1/2-inch dice
4 cloves garlic, smashed
2 Granny Smith apples, cut into 1/2-inch dice
5 bay leaves
1 cinnamon stick
1 bunch thyme
Kosher salt
1 quart chicken stock, divided
2 cups apple cider, divided
1/2 to 3/4 cup all-purpose flour 

Directions: To brine the turkey: Combine all of the ingredients for the brine in a large container. Add the turkey and let it brine in the refrigerator for 2 to 3 days.

To prepare the turkey for cooking: Remove the turkey from the brine the night before roasting and pat it thoroughly dry with paper towels. Combine the rosemary, sage, and butter for the herb crust in a small bowl. Season, to taste, with kosher salt. Work the butter under the skin of the turkey and massage it into the breasts and the legs. Massage the butter on the outside of the skin as well. Tie the legs together over the breast so they will protect it during cooking and help keep it moist and juicy.

Gravy preparation: Put the onions, carrots, celery, garlic, apples, bay leaves, cinnamon stick and thyme in a roasting pan and season with salt. Arrange the turkey on top of the veggies and refrigerate overnight UNCOVERED! Yes, that's right, uncovered. This will help the skin dry out and become really brown and crispy. Make sure that there is no raw food near the turkey in the refrigerator. After refrigerating overnight, the turkey is ready to go in the oven.

Preheat the oven to 450 degrees F.

Put 2 cups chicken stock and 1 cup apple cider in the bottom of the roasting pan. Roast the turkey in the preheated oven until the skin gets really nice and brown, about 40 minutes. Lower the oven heat to 350 degrees F for the remainder of the cooking time. Baste the turkey every 30 minutes or so and add more stock to the roasting pan, if needed. Cook about 17 minutes per pound. Once it gets to the proper color, tent the turkey with aluminum foil to prevent it from getting too dark.

Remove the turkey from the oven when an instant-read thermometer inserted in the thickest part of the turkey registers 160 degrees F. Make sure that the thermometer is not touching a bone when doing the reading. When the turkey has reached the proper temperature, remove it from the roasting pan to a cutting board and let it rest for at least 30 minutes. Cover loosely with aluminum foil.

Strain all the veggies over a bowl to separate them from the stock/mixture. Discard the veggies. Skim off the fat and add it to the roasting pan. This is the fat for the roux. Put the roasting pan over 2 burners and over a low heat and whisk in the flour. Cook until the mixture looks like wet sand, about 4 to 5 minutes. Slowly whisk in the remaining 1 cup apple cider, remaining chicken stock and the stock/cider mixture. Cook until the mixture has thickened and reached a gravy consistency. Taste and adjust the seasoning. Pour into a serving pitcher or bowl.


This is the last picture I have of the turkey. This is what it looked like after 45 minutes in the oven.


Sunday, November 13, 2011

Classic Crumb Cake

What dessert should I make? It was a toss up between cinnamon bunns or crumb cake and the hubby voted for crumb cake--so the crumb cake won. I found a recipe in my Martha Stewart's Baking Handbook that looked spectacular. I like crumb cakes with big chunks of crumbs on the top of it and this recipe was exactly that. I have had this cookbook for a year now and this is the first recipe I have made from it and it did not disappoint. I can't wait to make my next recipe from it. Enjoy!


Classic Crumb Cake
Makes one 13"x9" cake

Cake Ingredients:
10 tablespoons butter, softened
2 1/2 cups all-purpose flour
1 teaspoon baking powder
1 teaspoon baking soda
1/2 teaspoon salt
1 cup sugar
3 large eggs
1 1/4 cups sour cream
1 teaspoon vanilla extract

Crumb Topping Ingredients:
3 cups all-purpose flour
1 cup packed light brown sugar
1 tablespoon ground cinnamon
1 1/2 teaspoons coarse salt
1 3/4 cups unsalted butter, softened
confectioners’ sugar (optional)

Directions for cake: Preheat oven to 350 degrees. Butter a 9″x13″ pan and set aside. (I shaped the bottom of my pan with aluminum foil and then placed it into the pan. Then used Pam Spray instead of butter.) Mix together flour, baking powder, baking soda, and salt. Set aside. Beat butter and sugar on medium speed until light and fluffy. Add eggs, one at a time, mixing well after adding each one. Add vanilla. Add flour mixture and sour cream. Mix just until blended. Spread batter evenly into pan and set aside until you make crumb topping. 

Next make crumb topping. Combine flour, sugar, cinnamon, and salt. Cut in the butter with a pastry blender or a fork. (I would use a food processor next time I make this) When well mixed, the mixture should form large, moist clumps. Spread crumb topping evenly over cake batter.  Bake for 35 to 40 minutes or until done. (My crumb cake took 50 minutes) Turn the pan once during baking. Cool on a wire rack. Dust with confectioners’ sugar. 

I shaped the bottom of my pan with aluminum foil for easy removal after baked.